 |
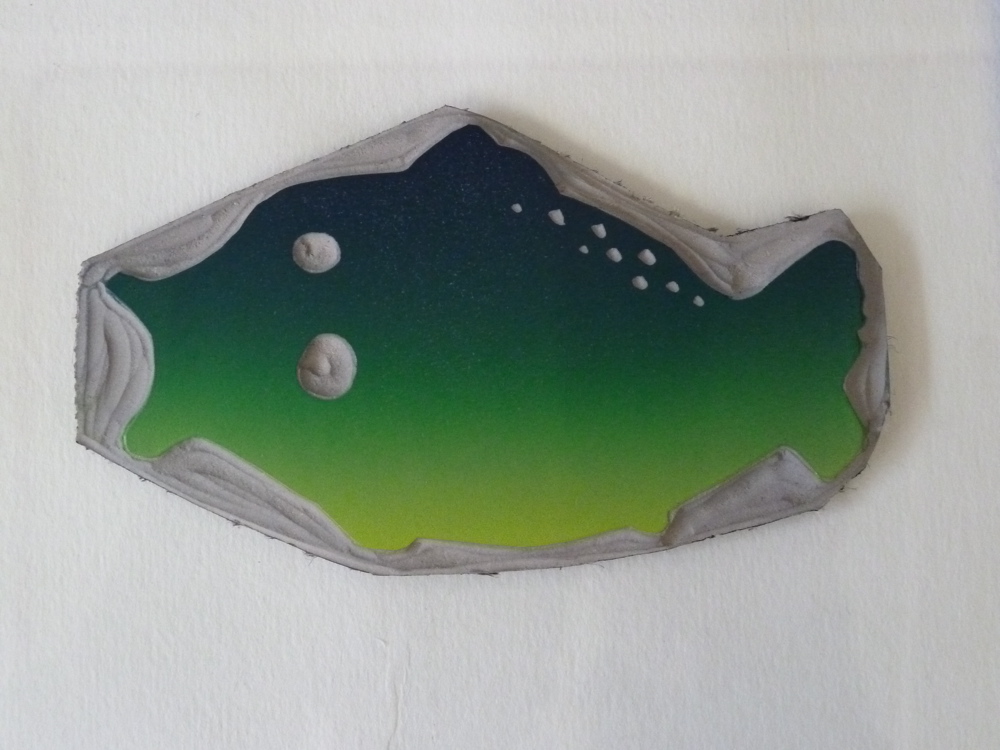
| Hungry Fish linocut with colour blend |
I've put together a mini tutorial below showing the steps in inking and printing the blocks. Hungry Fish is a two block print and you will also see my method for registering the blocks using a registration sheet.
The first step is to squeeze out your ink - in this case just two colours - onto your inking surface so they are the same distance apart as the width of your roller. I'm trying my new Caligo water-washable inks from Intaglio Printmaker (pthalo blue and process yellow in case you're interested)

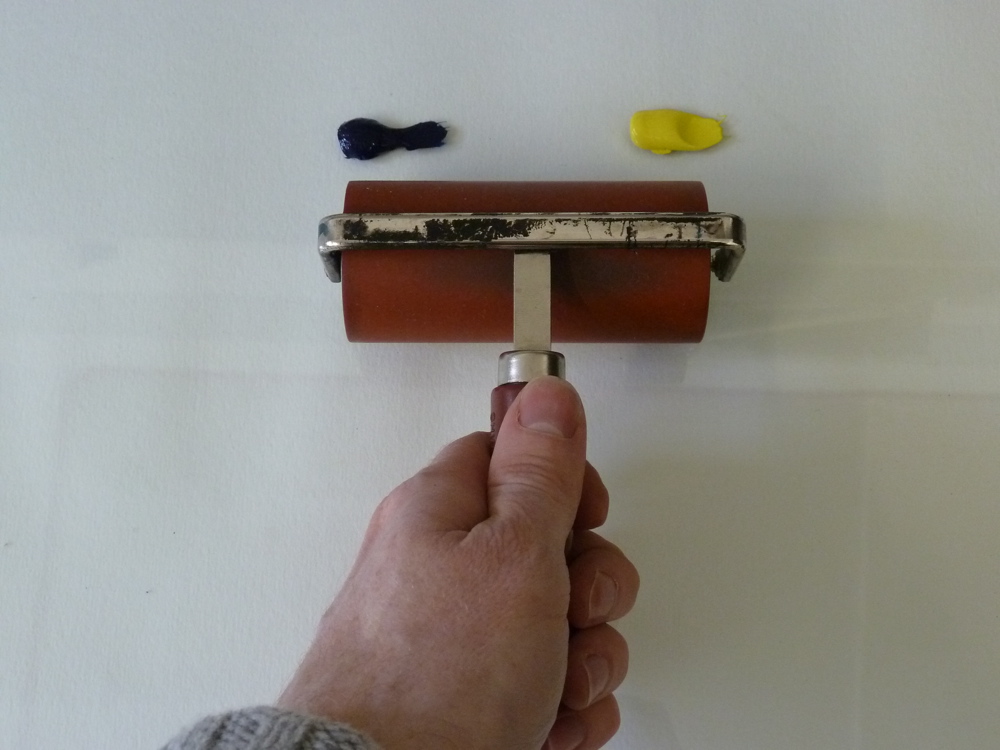
The next step is to pull some ink down with the roller and start rolling it out below the ink blobs:


As you roll the colours will gradually move together and start to blend. To speed this process up you can move the roller slightly to the left and right on alternate rolls.


As you keep rolling the colours will blend more and more. Once you are happy with the blend just roll over the same spot to stop it spreading further. You are now ready to ink up your block:


You must be very careful to get everything the right way round! Re-ink the roller in between rolls to avoid off-setting areas of the image back onto the block.

To register the two blocks I made a template out of clear plastic and drew round the blocks where I want them to go. A lot of my blocks are irregular shapes so it's easy to see where they have to go (and avoid putting them down upside-down).

To lower the paper onto the block I hold it down with two fingers of my left hand, making sure it's aligned with the template. I then lower it onto the block with my other hand.


After rolling it through the press I hold the paper in the same way to lift it so as to avoid smudging:

I usually print the second block straight away but if the ink is very thick or you are having problems you will have to leave it to dry first. I inked up the second block in two colours, using a small roller for the little red fish. This is the fiddly bit:


Once you get in the swing it is quite quick to print lots of images this size. I did about 30 in an hour or two. Here they are on my lovely new printing rack. If you want to buy a Hungry Fish they are available from my Etsy shop!

Great tutorial!
ReplyDeleteReally nice to get this info--Thanks!
ReplyDeleteVery much appreciated! Thank you.
ReplyDeleteJust love these fish- very effective with just two colours
ReplyDeletethank you very much, Nick! I was admiring a print today, by Philip Hartigan (http://philiphartiganpraeterita.blogspot.com/2011/06/interlochen-printmaking-class-day-5.html), where he has made a background for a lino reduction, that he calls a "three colour rainbow roll". I wondered if he had done this by using different rollers, or by inking up one roller - in the way you have just demonstrated. Now I know!
ReplyDeleteHope you don't mind me posting this link in your comments. It's quite "safe" - I have been there myself! I think you might like Philip's blog, if you haven't already seen it. Loads and loads of posts, many of them very interesting. Quite a lot about printmaking too!
Thank you for the tutorial. I will have a go at this some time soon. I'll also investigate those inks, as I need to buy some, but didn't want to buy big expensive tubs, which I wouldn't use up. (I'm not going to be doing that much printing just yet!)
This a really well explained tutorial and I love the result. Registration has various forms of practise and a free form image is certainly easier than ones I have done in the past , edge to edge on large papers. This invloves marking a large underneath sheet the size of your paper and marking the size of your actual plate and marrying the two sets of markings, not bad once you are used to using this method and can be managed on my own.I have yet to use the rainbow roll but is very nice effect and I like the idea of two plates.
ReplyDeletegreat post - thanks for sharing this... what do you think of the caligo water based inks?
ReplyDelete